Article: Rigging Bobber Doggin' Floats (How-to)
Rigging Bobber Doggin' Floats (How-to)
How to Rig a Float Rod for Steelhead Fishing: A Simple Step-by-Step Guide
Steelhead fishing can be an exciting challenge, and one of the most effective ways to target these elusive fish is by bobber fishing. Whether you’re in a drift boat or casting from the shore, having the right rig setup can make all the difference. In today’s tutorial, we'll walk you through the essentials of rigging a float rod for steelhead fishing in a small Southern Oregon stream. Let’s dive into the gear and setup you need to get started!
The Gear You'll Need
Before you hit the water, let’s go over the basic gear:
- Rod and Reel: For this setup, we’ll use a 9'6" Loomis E6X 11 43G rod with a 6-12 weight rating, paired with a Stradic Creed reel. This combo is perfect for handling the weight and sensitivity needed for bobber fishing steelhead.
- Main Line: A 30lb PowerPro braid, with a mono base to prevent it from slipping on the spool. This braid gives you strength and sensitivity.
- Leader Line: Typically, you’ll run an 8lb Maxima UltraGreen leader for the best balance of strength and invisibility.
Step 1: Attach the Bobber Stop
The first step is attaching a bobber stop to the mainline. This simple tool will keep your bobber in place during your drift. Here’s how:
- Slide the bobber stop onto the braid.
- Adjust it to your desired position.
- Tighten and trim the excess, so it's snug and streamlined.
Step 2: Add the Bead
Next, add a bead onto the mainline. This small piece of gear helps to protect the knot and prevent it from slipping. Simply slide it onto the line until it reaches the bobber stop. This bead will sit in front of the bobber, keeping everything in place.
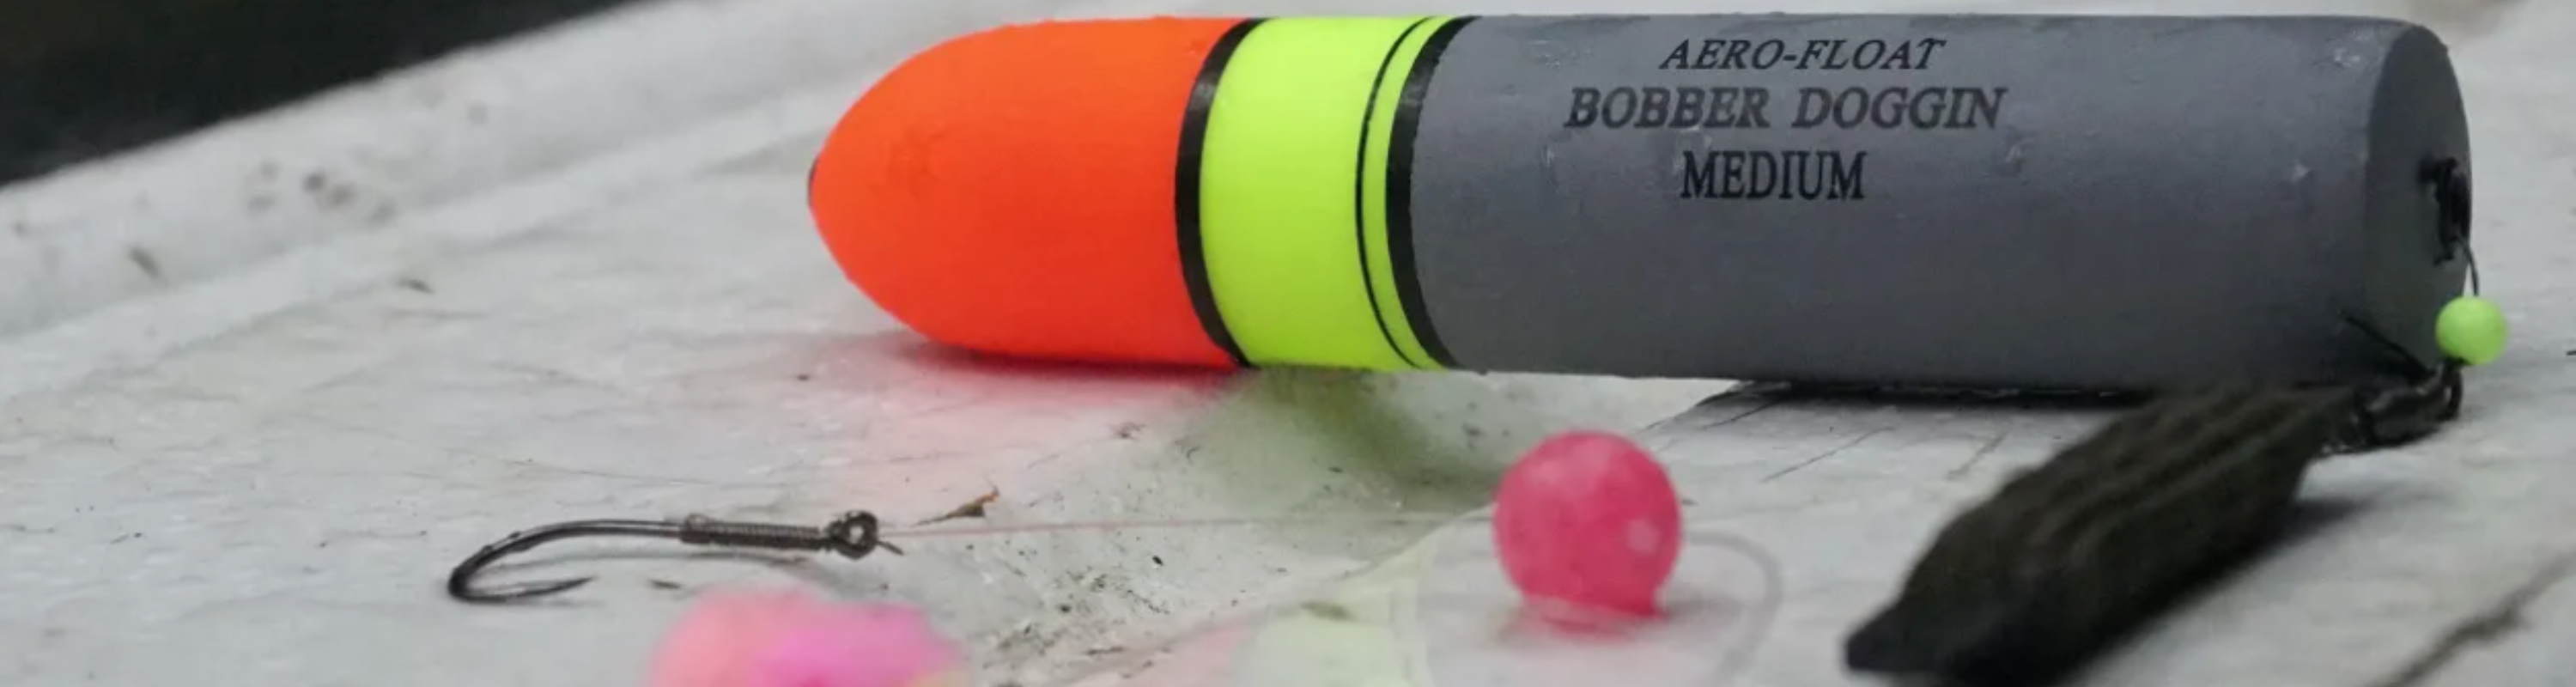
Step 3: Attach the Bobber
For this setup, we’re using Aero floats with a flat side. These floats are great for low, clear water, and they provide excellent drift control, even in slow-moving streams. Slide the bobber onto the line until it reaches the bead, and you’re ready to go!
Step 4: Add the Weight
The weight system is a key component of your rig. You can use an inline weight, but for adjustable depth control, we prefer a sliding weight system. Here’s how to rig it:
- Attach a snap swivel to the mainline.
- Connect it to a barrel swivel.
- Add a 4-ball slinky weight system. This allows you to adjust the weight as needed, depending on water depth and current speed.
A slinky weight system gives you flexibility to adjust the drift and stay in the target zone longer.
Step 5: Attach the Leader and Hook Setup
Now it’s time to attach the leader. For this rig, we’re using a two-hook setup, perfect for adding a yarn ball and bead combo. Here's the breakdown:
- Tie a 10mm bead onto the leader for a clear-water setup.
- Add your yarn ball on the top hook.
- Attach the bottom hook with the bead pegged above it.
This setup mimics natural steelhead food sources and is effective in attracting fish.
Adjusting for Conditions
One of the biggest advantages of this float rod setup is its versatility. If you’re fishing deeper holes or faster currents, you can increase the weight on the rig. For slower, shallower areas, a lighter weight will keep things drifting naturally.
Ready to Hit the Water?
Whether you're fishing from a boat or from the bank, this rig is perfect for getting your bait in front of the steelhead and keeping it there. With the right setup and a bit of practice, you'll be ready to catch that elusive steelhead.
Have any tips or tricks for float fishing? Drop a comment below and share your favorite setup with us!
And don’t forget—if you’re looking for premium fishing gear, check out Hawken Fishing for our top-of-the-line rods, reels, and tackle.